🛩️Drone Target Simulator

©️ Copyright Statement
All rights reserved of this software belong to Tofu Intelligence®. Ongoing development and maintenance are provided.
The program is an EXE package compatible with Windows system. Trial access is available. Please contact sales team for
authorization code.

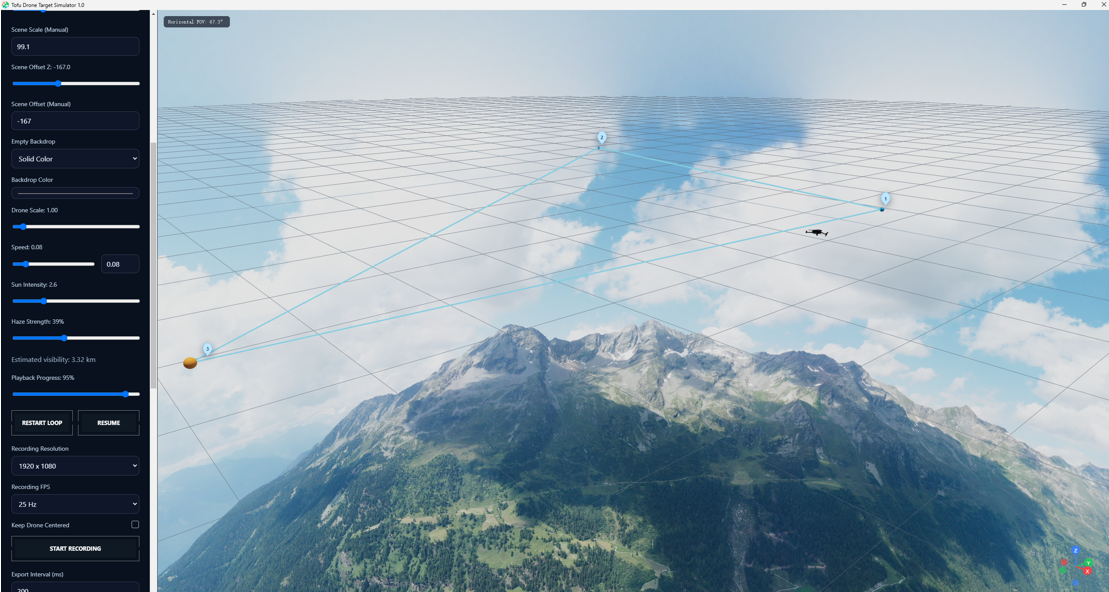
Tofu Drone Target Simulator
Customer User Guide
Version: 1.0
Document Type: End-User Operating Manual
Language: English
1. Introduction
Tofu Drone Target Simulator is a desktop simulation tool used to place, animate, and observe aerial targets inside customizable 3D environments. It is designed for target simulation, route planning, visual scene composition, recording, data export, and licensed closed-loop integration workflows.
The software supports multiple target categories, including:
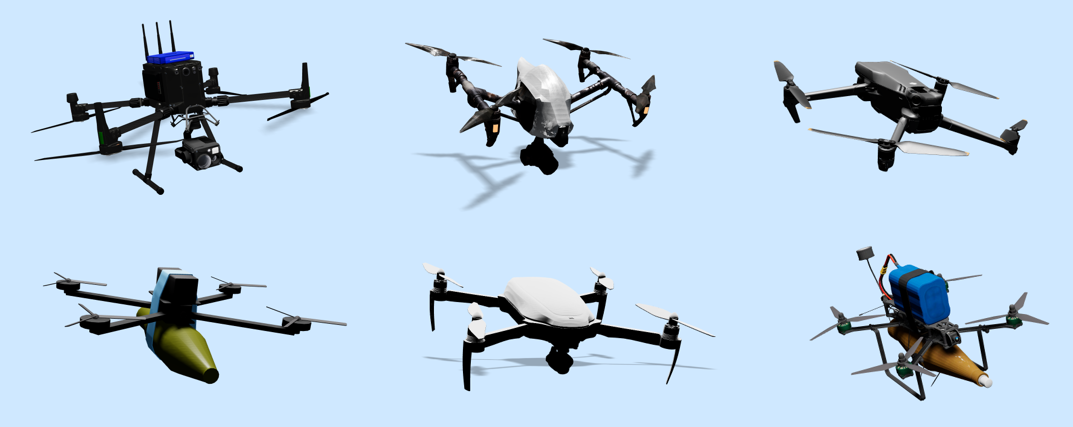
- Drones 6types
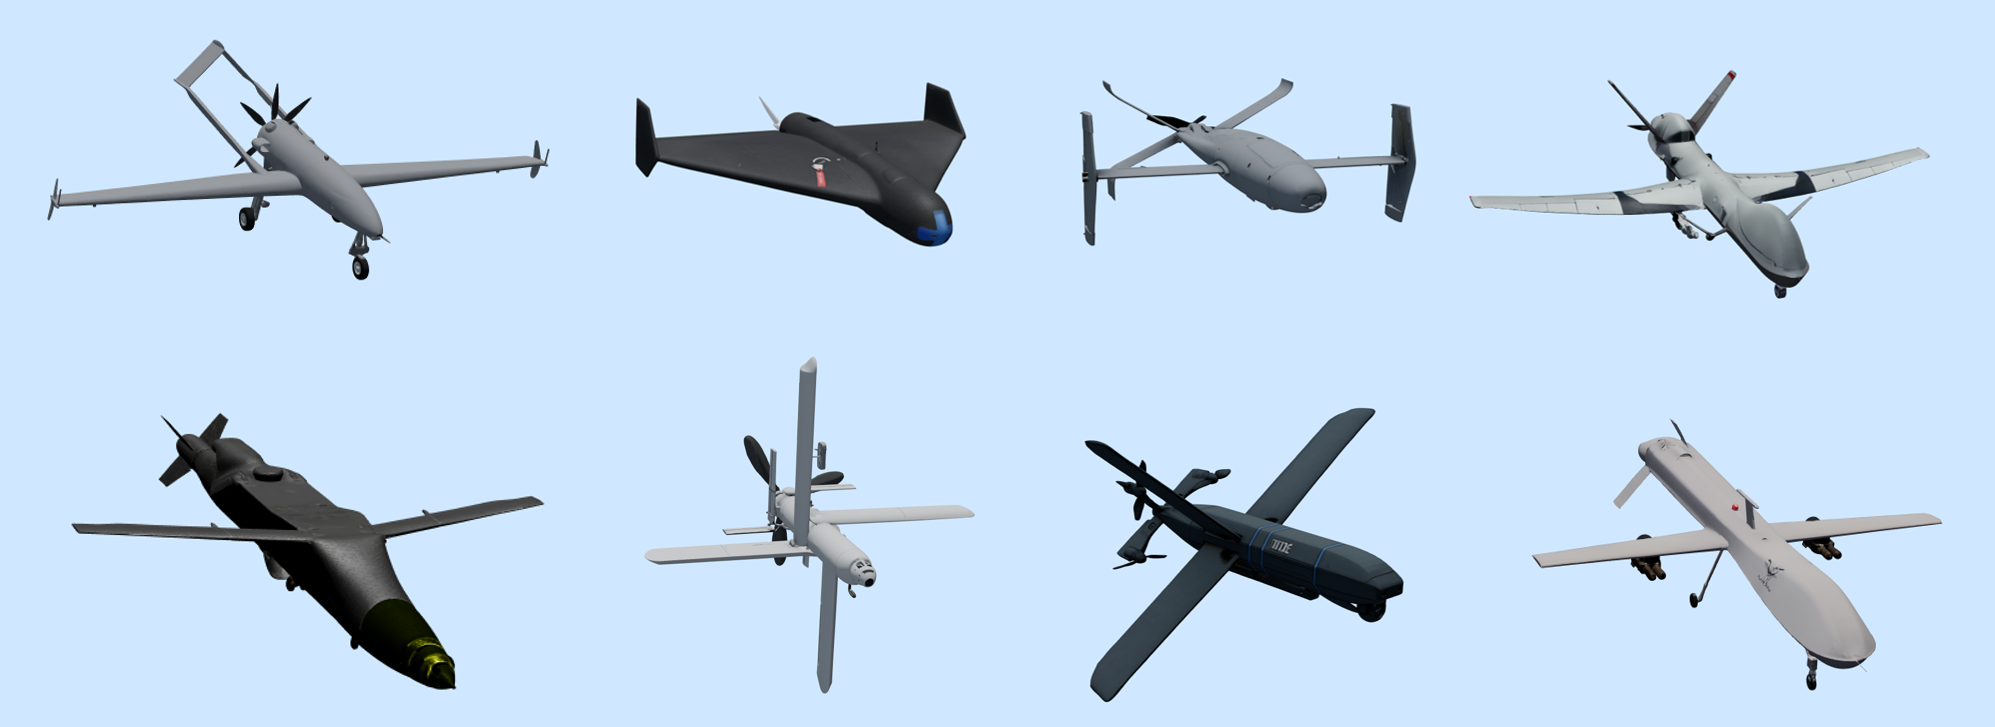
- Fixed-Wing Drones 23types
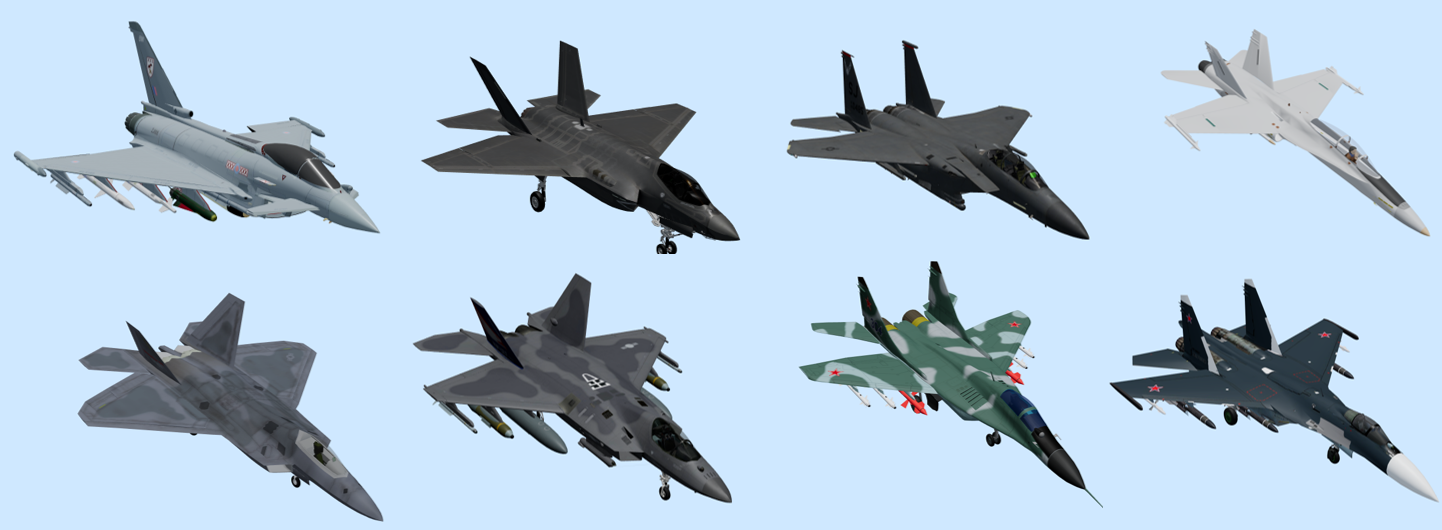
- Fighter Jets 17types
- Birds 2types
It also includes advanced features such as:
- Model scaling and per-model calibration
- Background image and 3D scene configuration
- Route editing and playback
- Video recording
- VOC dataset export
- RTSP streaming
- Closed-loop PTZ integration
- English/Chinese interface switching
- License-based feature control
This guide is written for customers and focuses on practical software operation.
2. System Overview
The software is divided into two main areas:
-
Left Control Panel
Used for all settings, target selection, calibration, route editing, recording, dataset export, licensing, and integration options. -
Main 3D Viewport
Used to preview the current scene, target motion, camera view, route points, and overlays such as field of view and target distance.
3. First Launch
When you start the software:
- A startup animation may appear first.
- The main application window opens.
- The software checks the license state.
- If a valid customer license is present, licensed features become available.
- If no valid license is present, the software may enter a trial state if applicable.
- Some advanced functions remain disabled until a valid license is loaded.
4. Language Switching
The application supports both English and Chinese.
How to change language
At the top of the left panel, use the language switch slider to toggle between:
ChineseEnglish
Behavior
- The UI changes immediately after switching.
- The selected language is saved automatically.
- On the next launch, the software restores the last selected language.
5. License and Activation
Licensing controls access to advanced features such as:
- Closed-loop PTZ integration
- RTSP streaming
- Recording export restrictions in unlicensed mode
- VOC data export restrictions in unlicensed mode
License area
At the top of the control panel, the software shows:
- License status
- Machine code
- License import control
- Trial status
- Customer name
- Expiry date
License states
Possible license states include:
- Activated
- Not Activated
- Trial Active
- Trial Expired
- Invalid License
- License mismatch
- Permanent License
- Expiring License
Machine code
If the software is not yet licensed, a machine code is generated automatically.
Use the Copy Machine Code button to copy it and send it to the licensing provider.
Importing a license
To import a license file:
- Locate the Import License File field.
- Select a valid
license.dat,.json, or supported license file. - Wait for verification.
- If valid, the application updates the activation state immediately.
License auto-load from folder
The software can also read a license file automatically from the application lic folder on startup.
Important behavior
- The application only trusts a valid license file.
- Old cached license state should not be treated as valid authorization by itself.
- If no valid license file exists, advanced licensed functions remain unavailable.
6. Main Interface Layout
The main interface contains the following functional areas:
- License and language section
- Target selection
- Model calibration
- Engine contrail control
- Closed-loop PTZ / RTSP panel
- Background settings
- Global simulation controls
- Recording controls
- VOC export controls
- Route visibility controls
- Camera tools
- Route editing section
- 3D viewport
- Overlay information area
7. Target Selection
Target categories
The software organizes targets into categories:
- Drones
- Fixed-Wing Drones
- Fighter Jets
- Birds
How to select a target
- Open the Target Model dropdown.
- Choose the desired target.
- The selected model loads into the 3D scene.
- Any saved model-specific scale or calibration settings are restored automatically.
Notes
- Different targets may have different visual behaviors.
- Some fighter jets support engine contrail effects.
- Some models may include special animation logic such as rotor motion.
8. Background Modes
The software supports three background modes:
- Image Background
- Solid Color
- 3D Scene Background
8.1 Image Background
Use this mode when you want a flat image as the environment.
Available options:
- Select an image from the built-in library
- Paste a direct image URL
- Upload a local image file
- Adjust image scale
Typical use cases:
- Quick visual mockups
- Static target presentation
- Lightweight background setup
8.2 Solid Color Background
Use this mode when you need a plain background color.
This is useful for:
- Technical demonstrations
- Clean captures
- Isolated target presentation
- Simplified training or annotation scenes
8.3 3D Scene Background
Use this mode when you want a full 3D environment.
Available options:
- Select a scene model from the library
- Adjust scene scale
- Enter manual scale values
- Adjust scene vertical offset along the Z axis
- Enter manual Z values
This is the most realistic mode for simulation.
9. 3D Scene Scale and Z Offset
When using a 3D background scene, you can adjust:
- Scene Scale
- Scene Offset Z
Scene Scale
This changes the overall size of the background scene.
Use it to:
- Match the environment to the target size
- Improve perspective consistency
- Fit the scene into the desired camera framing
Scene Offset Z
This moves the background scene up or down vertically.
Use it to:
- Align the scene with the target path
- Correct scene floor height
- Match the visual horizon
- Reposition the environment relative to the target
Persistence behavior
The application remembers the last scale and Z offset per background scene.
This means:
- If you adjust Scene A, switch to Scene B, then return to Scene A, your previous values are restored.
- These settings are also remembered after restarting the software.
10. Empty Backdrop Options for 3D Scenes
When using a 3D scene background, you can also configure the Empty Backdrop behind the scene.
Available modes:
- None
- Solid Color
- Texture
Use cases
This helps when:
- The scene itself does not fully cover the background
- You want a custom sky or flat fill
- You want a cleaner visual output for recording or streaming
11. Drone Scale
The Drone Scale slider changes the overall size of the selected target.
Important behavior
- Scale is remembered per target model
- Different models can have different saved scale values
- The value is restored automatically when switching back to a previously used model
- The value is also restored after restarting the application
Typical use cases
- Matching target size to a specific environment
- Visual calibration
- Presentation scaling
- Preparing scenes for RTSP output or annotation workflows
12. Model Calibration
Model calibration allows fine alignment of each target.
Open calibration panel
Click:
- Calibrate Model
When the panel is open, you can adjust:
- Position offsets
- Rotation offsets
- Model size
12.1 Position Offsets
Axes available:
- X Position
- Y Position
- Z Position
Use position offsets to:
- Move the model relative to its route center
- Align the target more precisely inside the scene
- Correct imported model anchor position
12.2 Rotation Offsets
Axes available:
- X Rotation
- Y Rotation
- Z Rotation
Use rotation offsets to:
- Correct model orientation
- Align the nose direction
- Fix asset import axis mismatches
- Improve realism during playback
12.3 Model Size
This field stores the physical size of the current target in meters.
Why model size matters
The model size is used in distance estimation during RTSP workflows.
The application uses model size together with:
- zoom ratio
- target pixel width in the RTSP frame
- sensor and focal length constants
to estimate target distance.
Save and reset
Buttons available:
- Save
- Done
- Reset
Persistence behavior
Calibration is stored per model.
That means each model remembers its own:
- position offsets
- rotation offsets
- physical size
13. Engine Contrail
Some targets, especially certain fighter jets, support engine contrail or exhaust trail rendering.
Contrail strength levels
The slider can represent:
- Off
- Light
- Medium
- Strong
Use cases
- Visual realism
- Jet presentation
- Motion enhancement during playback
- Streaming demonstrations
If a model does not support contrails, this control may not appear.
14. Playback and Simulation Speed
Speed
Use the Speed control to adjust motion speed along the route.
You can change it by:
- slider
- numeric input
Playback Progress
Use the progress slider to move to a specific point in the animation timeline.
Playback buttons
Available actions:
- Restart Loop
- Pause
- Resume
Recommended workflow
- Create or edit the route.
- Set target scale and calibration.
- Adjust background.
- Set playback speed.
- Use pause/resume to inspect motion.
- Use progress slider for frame-by-frame review.
15. Recording
The application supports recording the viewport output.
Recording options
You can configure:
- Recording resolution
- Recording FPS
- Centered recording mode
Centered recording
When enabled, the camera automatically keeps the drone centered during recording.
This is useful for:
- demonstration footage
- target tracking visuals
- clean operator review videos
Start recording
Click:
- Start Recording
Stop recording
Click:
- Stop Recording
Recording hints
The application may display runtime messages such as:
- recording started
- exporting file
- recording failed
- unsupported encoding
- local resource recommendations
Licensing note
In some configurations, recording export may require a valid license.
16. VOC Dataset Export
The software can export image and annotation data in VOC-style format.
What this is used for
- dataset generation
- machine vision workflows
- object detection training
- target annotation pipelines
Export interval
Set the Export Interval (ms) to control how frequently frames are captured.
Start export
Click:
- Start VOC Export
Stop export
Click:
- Stop Export and Download
Expected behavior
The system captures frames and generates annotation data while the simulation runs.
Important note
If the target is occluded or not visible, behavior may depend on current export logic, but the software is designed to support annotation workflows robustly.
Licensing note
VOC export may be disabled in unlicensed mode.
17. Route Editing
The software supports editable target routes inside the 3D scene.
Coordinate system
The route editor uses the following convention:
- X = left / right
- Y = forward / backward
- Z = height / vertical
Route controls
Available actions include:
- Add Route Point
- Cancel Add Route Point
- Clear Route
- Quick Add Point
- Back to Start
Visibility controls
You can toggle:
- route visibility
- route point visibility
- ground grid visibility
Editing a selected point
When a route point is selected, you can edit:
- X
- Y
- Z
- Z slider
Adding new points
When adding points:
- Click Add Route Point
- The view switches into a top-down workflow
- Place the point on the ground plane
- Adjust the Z height separately
Point list
Each route point is shown in the control panel with:
- point index
- X value
- Y value
- Z value
- delete action
Best practice
For smoother motion:
- add points in the order of travel
- avoid extreme jumps in height
- preview playback after edits
- refine point positions gradually
18. Camera Controls
The 3D viewport supports interactive camera control.
Mouse controls
Current control mapping is:
- Left Mouse Button: Pan
- Middle Mouse Button / Wheel: Dolly / Zoom
- Right Mouse Button: Rotate
Additional camera tools
Buttons in the panel include:
- Reset Camera
- Focus Background Scene
When adding route points
The camera can switch to a more top-down behavior to make point placement easier.
19. On-Screen Overlay Information
The viewport can display additional real-time information.
Horizontal FOV
The application can show:
- Horizontal Field of View
Target distance
During RTSP streaming workflows, the application can also show:
- Target Distance
This distance is derived from the model size, zoom data, and observed pixel width.
20. Closed-Loop PTZ Integration
The software supports licensed closed-loop workflows with PTZ-related devices.
License requirement
Closed-loop PTZ features are unavailable without a valid license.
Main components
The panel can include:
- Pelco-D angle device connection
- Zoom information device connection
- PTZ view switching
- RTSP streaming setup
21. Pelco-D Angle Device
This section is used for an angle-control device.
Typical settings
- IP address
- Port
- Connect / Disconnect
What it provides
- pan information
- tilt information
- axis display
- PTZ view mode switching
View modes
Possible view modes include:
- PTZ View
- External View
Axis display
You can show or hide the PTZ origin axis for debugging and alignment.
22. ZoomInfo Device
This section is used for zoom information acquisition.
Typical settings
- IP address
- Port
- Connect / Disconnect
What it provides
- current zoom ratio
- base zoom
- raw zoom values for diagnostics
This information is important for distance estimation and integration workflows.
23. RTSP Streaming
The software supports RTSP output for integration and external device consumption.
License requirement
RTSP streaming is a licensed feature.
Built-in components
The customer edition includes built-in runtime support for:
- RTSP server handling
- FFmpeg-based media pipeline
RTSP configuration options
You can configure:
- Resolution
- FPS
- Bitrate
- Port
Start streaming
Click:
- Start Stream
Stop streaming
Click:
- Stop Stream
RTSP URL
Once streaming starts, the application displays an RTSP URL that can be copied.
Important network behavior
The software uses a runtime-detected local IP address for the address shown to external consumers. It is not intended to be a permanently hard-coded external IP.
Encoder display
During streaming, the application may show the current encoder mode, such as:
- WebCodecs H264
- GPU-based encoding
- CPU-based encoding
Typical customer workflow
- Activate a valid license
- Configure resolution, FPS, bitrate, and port
- Start stream
- Copy the RTSP URL
- Open it in the downstream consumer or compatible client
24. Distance Estimation During RTSP
When RTSP streaming is active, the application can estimate target distance.
Inputs used
The distance calculation uses:
- model size in meters
- zoom ratio
- detected target width in pixels
- internal optical constants
Why pixel filtering is needed
Targets with moving rotors or fast animation can produce unstable bounding widths frame-to-frame. The software applies filtering so the pixel measurement remains more stable.
Practical note
Distance output is an estimate and should be treated as operationally useful, not necessarily a certified measurement.
25. Recommended Standard Workflow
For a typical customer use case, the recommended workflow is:
- Start the software
- Confirm the correct language
- Check license status
- Select the target model
- Adjust drone scale
- Open calibration and fine-tune the model
- Choose a background mode
- Adjust scene scale and Z offset if using a 3D scene
- Create or edit route points
- Preview motion with playback controls
- Enable contrail if needed
- Record video or export VOC data if required
- Start RTSP or closed-loop functions if licensed and needed
26. Tips for Best Results
For realistic visualization
- Use a 3D scene background
- Match target scale carefully
- Calibrate rotation before recording
- Use moderate playback speed for review
For route editing
- Keep route transitions smooth
- Avoid overly sharp height jumps
- Use top-down point placement first, then refine Z
For RTSP workflows
- Confirm license validity first
- Enter correct network and port settings
- Verify downstream client compatibility
- Use a stable scene and correct model size for better distance estimates
For dataset export
- Make sure the target remains visible
- Use a suitable export interval
- Verify route and camera framing before long exports
27. Troubleshooting
27.1 License not activated
Possible causes:
- no license file imported
- invalid license file
- expired license
- machine code mismatch
What to do:
- Copy the machine code
- Request the correct license
- Import the license again
- Restart the application if required
- Check the license message shown in the panel
27.2 Closed-loop or RTSP controls are disabled
Possible cause:
- no valid license is active
What to do:
- Activate a valid customer license first
27.3 Background scene looks too large or too small
Possible cause:
- scene scale is not matched to the selected target
What to do:
- adjust Scene Scale
- compare against target size visually
- fine-tune Z offset if alignment is wrong
27.4 Target appears misaligned or rotated incorrectly
Possible cause:
- imported model orientation or anchor mismatch
What to do:
- Open model calibration
- adjust position offsets
- adjust rotation offsets
- save the calibration for that model
27.5 Recording or export result is not ideal
Possible causes:
- wrong framing
- route too fast
- target partially outside the viewport
- poor scene alignment
What to do:
- pause playback and refine the route
- reduce speed
- enable centered recording if needed
- confirm visibility before exporting
27.6 RTSP stream not usable by downstream client
Possible checks:
- confirm the stream is started
- confirm the correct port
- confirm the shown RTSP URL
- confirm the receiving device is on the same reachable network
- verify the license is active
- verify the downstream client supports the stream format
28. Frequently Asked Questions
Q1. Does the software remember my last language?
Yes. The selected language is saved and restored automatically.
Q2. Does the software remember per-model scale?
Yes. Each target model remembers its own scale.
Q3. Does the software remember 3D scene scale and Z offset?
Yes. These values are remembered per background scene and restored automatically.
Q4. Does each model remember its own calibration?
Yes. Position, rotation, and model size are stored per model.
Q5. Can I use RTSP without a license?
No. RTSP is a licensed feature.
Q6. Can I use closed-loop PTZ without a license?
No. Closed-loop functions are blocked without a valid license.
Q7. What is the model size field for?
It is used for distance estimation during RTSP workflows.
Q8. What if I change language after activating the software?
The interface updates immediately, and the selection remains saved.
29. Safety and Operational Notes
- This software is a simulation and integration tool.
- Distance estimation should be treated as operational guidance unless externally validated.
- Always verify licensed workflows before field use.
- For customer deployment, only use valid license files issued for the correct machine code.
- Keep exported data and recorded media in an approved storage location according to your internal process.
30. Quick Start Checklist
Use this checklist for a fast setup:
- Launch the software
- Switch the interface to English if needed
- Confirm license status
- Select the correct target model
- Set target scale
- Calibrate model if needed
- Select background mode
- Adjust scene scale and Z offset
- Create or load route points
- Preview playback
- Record, export, or stream as needed
31. Short Operator Workflow Example
Example: Create a fighter jet simulation and stream via RTSP
- Start the application
- Confirm the license is active
- Select a fighter jet model
- Set the appropriate drone scale
- Enable engine contrail if desired
- Choose a 3D scene background
- Adjust scene scale and Z offset
- Edit route points
- Preview the motion
- Open the closed-loop / RTSP section
- Set resolution, FPS, bitrate, and port
- Start RTSP stream
- Copy the RTSP URL
- Verify the stream in the receiving system
32. Contact / Support Information
For customer support, please provide the following when reporting an issue:
- software version
- screenshot of the issue
- current license status
- target model in use
- background mode in use
- whether recording / RTSP / PTZ was active
- the exact error message shown in the panel
